
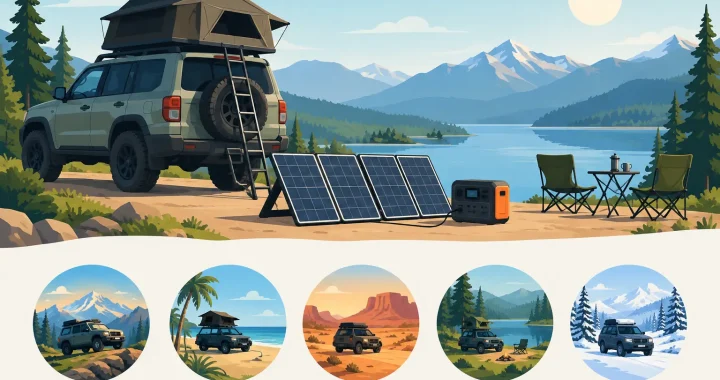
A dead battery is more than an inconvenience when your route is miles beyond the nearest campground. It can mean losing navigation, refrigeration, work capability, communications, or a dependable way to charge essential gear. The best solar kits for overlanding keep your vehicle and camp powered quietly, without carrying fuel or idling the engine for hours.
The right setup is not always the one with the largest panel or highest battery capacity. It is the one that matches how long you travel, where you camp, what you need to run, and how much space you can dedicate to power equipment. A weekend trail rig needs a different solar kit than a family SUV supporting a fridge, recovery gear, laptops, lights, and several days away from pavement.
What Makes a Solar Kit Ready for Overlanding?
For overlanding, a solar kit should be built around a portable power station, solar panels, and the cables or adapters required to connect them safely. This approach gives you useful power at camp without permanently modifying your vehicle’s electrical system. It also lets you move the panels into full sunlight while the vehicle remains parked in shade.
Start with battery capacity, measured in watt-hours, or Wh. This tells you how much stored energy you have available. A 500Wh power station can handle smaller devices and short refrigerator duty, while a 1,000Wh to 2,000Wh class system is a better starting point for multi-day travel with a compressor fridge, camera batteries, lights, and personal electronics. If you need to run high-draw equipment, expansion batteries can be more valuable than buying more panel wattage alone.
Next, look at solar input. Panel output is expressed in watts, but real-world production changes with sun angle, heat, cloud cover, dust, tree cover, and the time of year. A 200W panel may deliver considerably less than 200W during much of a normal day. For that reason, adequate panel capacity and a fast solar input limit on the power station both matter.
A practical overlanding kit should also use LiFePO4 battery chemistry, a pure sine wave inverter, regulated outputs, and an MPPT charge controller built into the power station or supplied with the kit. LiFePO4 batteries are well suited to frequent cycling and long-term ownership. A pure sine wave inverter provides cleaner AC power for sensitive electronics, chargers, and appliances.
1. Best Solar Kit for Weekend Overlanders
For one- or two-night trips, a 500Wh to 800Wh power station paired with a 100W to 200W portable solar panel is usually the sensible choice. This type of kit is easy to load, quick to deploy, and capable of supporting phones, headlamps, GPS units, a camera, a small fan, and camp lighting. It can also keep a modest 12V compressor fridge running when conditions are favorable.
This is the best fit for drivers who spend more time moving than sitting in camp. You may not need enough solar to fully recharge every day if the power station starts full and your vehicle provides charging while driving. The advantage is efficiency: less weight, fewer cases, and less space taken from recovery gear, food, and water.
The trade-off is limited reserve power. If you run a fridge, charge multiple devices, and experience cloudy weather, a 500Wh system can be depleted faster than expected. Treat it as a compact power source, not a replacement for a large house battery bank.
2. Best Solar Kit for Fridge-First Campers
A 1,000Wh to 1,500Wh LiFePO4 power station with 200W to 400W of portable solar is a strong all-around setup for overlanders who depend on a 12V compressor fridge. This range gives you enough stored power to cover overnight use and enough panel capacity to recover meaningful energy during a clear day.
Your fridge is likely the most consistent draw at camp, but its actual consumption depends on ambient temperature, insulation, how often it is opened, and its thermostat setting. A fridge that runs lightly in cool weather may become a much heavier load during a desert afternoon. That is why a larger battery buffer matters even when your panel appears sufficient on paper.
Choose a power station with a regulated 12V output, multiple USB-C ports, and enough AC inverter capacity for occasional use of laptop chargers or small appliances. Keep the fridge on DC whenever possible. Converting battery power to AC and then back to DC through a power brick wastes energy that can be saved for the next night.
3. Best Solar Kit for Remote Work From the Trail
Remote work changes the power calculation. A laptop, cellular hotspot, camera gear, monitor, drone batteries, and task lighting can turn a quiet camp into a real mobile office. For this use case, consider a 1,500Wh to 2,000Wh power station with at least 300W of solar input capability and matching panels.
The key is not just capacity. It is output flexibility. Look for several USB-C ports with high charging output, standard USB ports, DC outputs, and enough pure sine wave AC capacity to run the chargers you actually use. You should not have to choose between charging a laptop and keeping the refrigerator cold.
Portable panels are often better than roof-mounted panels for remote work because they can be aimed at the sun throughout the day. Put the power station under an awning or inside the vehicle, then place the panels away from camp shadows with a properly sized extension cable. Check cable ratings and connector compatibility before leaving home.
4. Best Solar Kit for Family and Basecamp Travel
Longer stays with several people call for a larger system: a 2,000Wh power station, expansion battery capability, and 400W or more of portable solar capacity. This category is designed for families, group camps, hunters, photographers, and basecamp travelers who run refrigeration, lights, personal devices, fans, radios, and occasional higher-draw equipment.
Expansion capability is especially useful here. More solar helps you recharge during the day, but a larger battery bank is what carries you through storms, shaded campsites, and several nights of high use. If your typical trips involve dispersed camps under trees, prioritize stored energy first and treat solar as a recovery source when weather permits.
A higher-capacity inverter can also support equipment such as electric cooking appliances, small coffee makers, or portable air compressors. Use those loads carefully. A high-watt appliance can consume in minutes what lights and phone charging use over many hours. Check both the appliance wattage and its expected runtime before making it part of your daily routine.
5. Best Solar Kit for Vehicle-Independent Power
Some overlanders want power that can be moved beyond the vehicle. A portable power station with folding panels is ideal for a tent camp, a fishing spot, a trailhead work area, or an emergency situation at home after the trip. This is where portability, durable panel stands, and fast recharging become more valuable than a permanently mounted system.
A 1,000Wh to 2,000Wh unit with 200W to 400W of folding solar offers a balanced solution. You can use it as your camp power center, then bring it inside during severe weather or move it to another vehicle. Thundervolt Power focuses on this type of practical energy readiness: quiet, rechargeable power that serves travel plans and unexpected outages alike.
The limitation is setup time. Roof panels produce energy while you drive and stop, while portable panels must be unpacked, positioned, and secured. Many experienced travelers combine both approaches, using a small roof panel for maintenance charging and portable panels for serious daily recovery at camp.
How to Size Your Overlanding Solar Kit
Before buying, estimate the watt-hours you use in a day. Multiply each device’s wattage by the number of hours it runs. A 45W laptop used for four hours needs about 180Wh. A 10W light used for five hours needs 50Wh. Add refrigerator consumption based on the manufacturer’s real-world guidance, then include a margin for inverter losses, hot weather, and charging inefficiency.
Do not plan to drain a battery to zero every day. A reserve protects your food, navigation, and communication gear when clouds roll in or plans change. For most overlanders, sizing the battery for at least one full day of use without solar provides a far more dependable experience.
Panel size should reflect your ability to recharge that daily use. If your camp is often exposed to open sun, portable solar can cover much of the load. If your routes favor forests, canyons, or winter travel, choose more battery capacity and maintain an alternate charging plan through your vehicle or shore power when available.
Field Practices That Protect Your Power
Set panels where they receive direct sun, even if that means placing them 20 or 30 feet from camp. Keep connectors dry and off the ground, secure panels against wind, and avoid driving over cables. Wipe dust and mud from panel surfaces because a dirty panel can noticeably reduce charging performance.
Keep the power station out of direct sun and away from standing water. Heat is hard on batteries and can cause a unit to reduce charging or output to protect itself. Charge critical equipment early in the day whenever possible. That simple habit leaves more daylight available to recover power if conditions change.
The best overlanding solar kit is the one you understand before the trail begins. Test it at home, learn how your fridge behaves, and confirm every cable, adapter, and charging port works with your gear. When camp is remote and the weather turns, familiar power equipment gives you one less problem to solve.
